We all love github and want to version our work and our apps with it. But usually the database is missing, which means that both schema, configuration and demo-data aren't in the versioning. Now we can do it - here's how:
Overview
The following instructions assume you already created a 2sxc App and now you want to get it into Github. The steps we'll go through are as follows:
- Initialize a new github repository which will contain our app
- Sync our /portals/[id]/2sxc/[yourapp] with the new repository
- Add the data with schema an all to the repo
Create your App Github Repository
To start this, you'll need to create a github repository. This assumes you have a github account - if you don't, go ahead and create it. It's free for open-source projects.
Let's create the repo - like this:
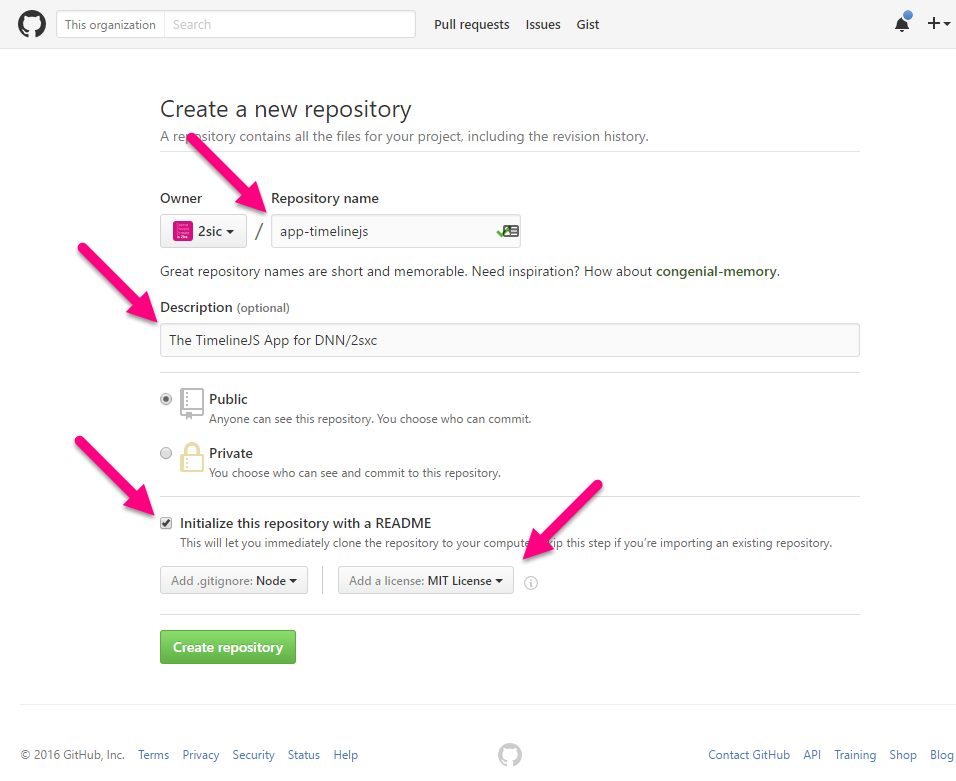
Some recommendations
- I would name my repo "app-yourname" or "dnn-app-appname" or something.
- A short description is helpful, but you can always change it again later
- I recommend you also add a readme.md and a license (MIT is nice) as well in the initial dialog.
Sync the GitHub Repo Into Your Local App
Now you have a public repo which is almost empty, and a local file-storage which already contains stuff. You can't automatically merge this, because when you clone an online repo to your pc/network, it always wants to start with a clean slate to copy into. So here's how you do it:
- Rename your original app-folder so you can clone the git from the source - like "TimelineJs" to "temp TimelineJS"
- From the parent folder (the Portal/portal-name/2sxc) call "git clone https://...yourstuff… your-app-name" - so "git clone http… TimelineJS"
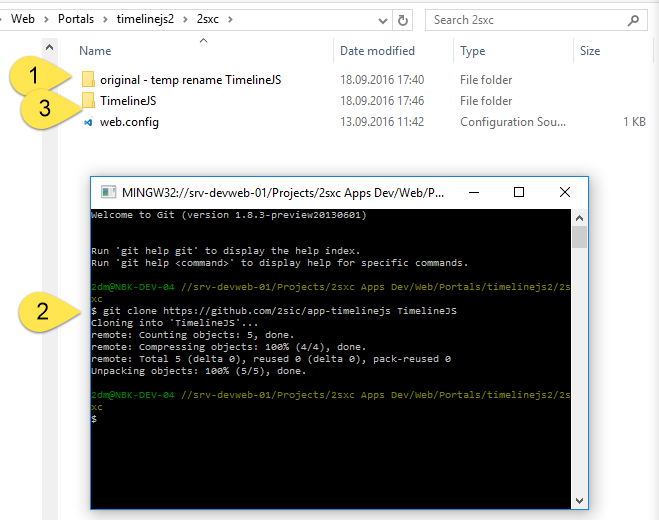
- Copy all the content from your temp folder back into the correct, git-initialized folder
Now you have a local repo with all the files, and you'll need to add data, then sync it back.
Add the Database - Schema and Data - to Your Repo
This is a new feature in 2sxc 8.5.3, which will export your entire schema into an app.xml stored in a folder called ".data". This folder is special (like node_modules or bower_components) in that it will be ignored in future app-packaging.
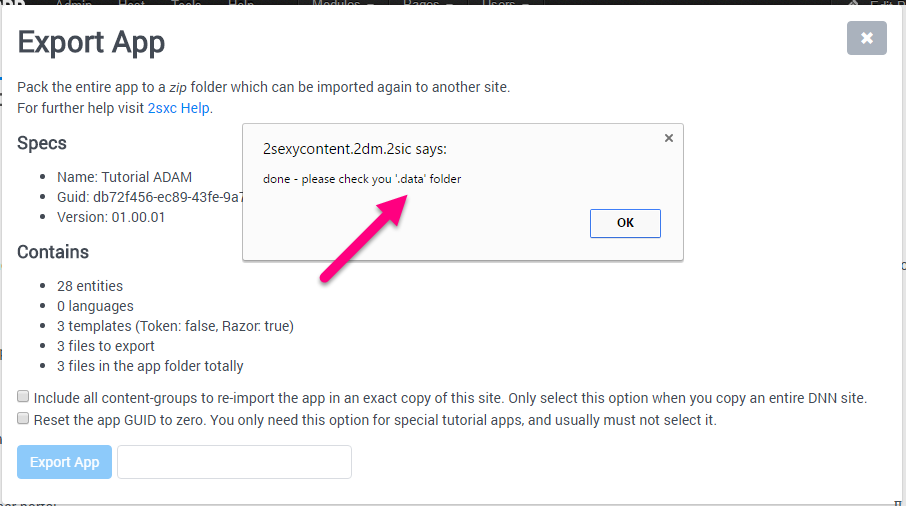
To do this, go to App-Settings > App > Export; then press the second button which will just export the data:

When this is done (usually in about 1 second) you see:
Commit all Changes Back to the Repo
Using your git-tool of choice (I like Visual Studio Code or SourceTree, but many prefer command lines) add the new stuff and push it back to the server. Since all these tools recognize a git-repo, in most tools you only need to do a push/sync and you're done.
IF YOU'RE USING THE COMMAND LINE, then this is what you need to do:
- Open a git-bash in that folder
- Add all new files (the dot at the end is important): git add .
- Then commit this: git commit -a -m "added everything"
- Then push to origin: git push
TL;DR
With 2sxc 8.5.3 you finally have full github support, from not-including private folders in your repo to versioning your schema and data, you're ready to go.
Love from Switzerland,
Daniel